Sharing files
In FastDrive, you can share files and folders so that other people can access them. You can share files and folders with both FastDrive users and non-FastDrive users via the sharing feature that is available within FastDrive.
In order to share a file with someone else, firstly navigate to that file within the FastDrive web app. In this instance I have delved into my personal folder so that I can share a folder named TestFolder1.
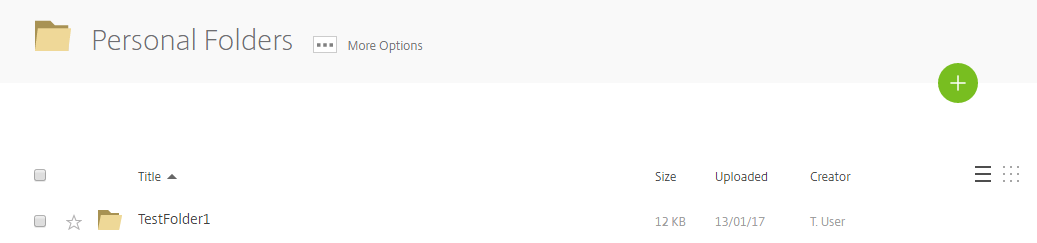
To the left of the folder name, there is a checkbox so that you can select this folder. Tick this box and you will see a variety of options that are available to you. In this instance, we want to share this file, so click the share button.

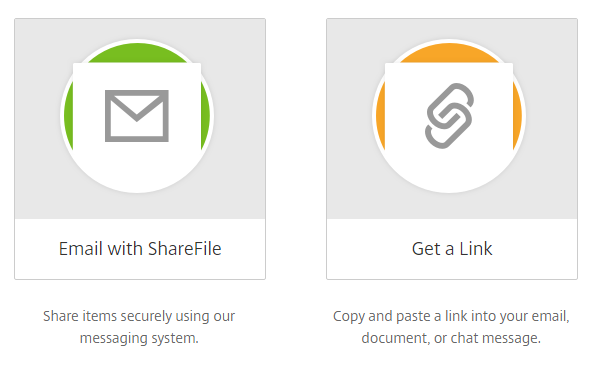
Two options will then appear; Email with ShareFile and Get a Link. These are two different ways of sharing files.
Email with ShareFile is more useful when you wish to share files with other FastDrive users.
Get a Link is more useful when you wish to share files with users that don’t have FastDrive.
Firstly, we’ll go through Email with ShareFile.
Once you’ve clicked Email with ShareFile, you’ll see the following screen.
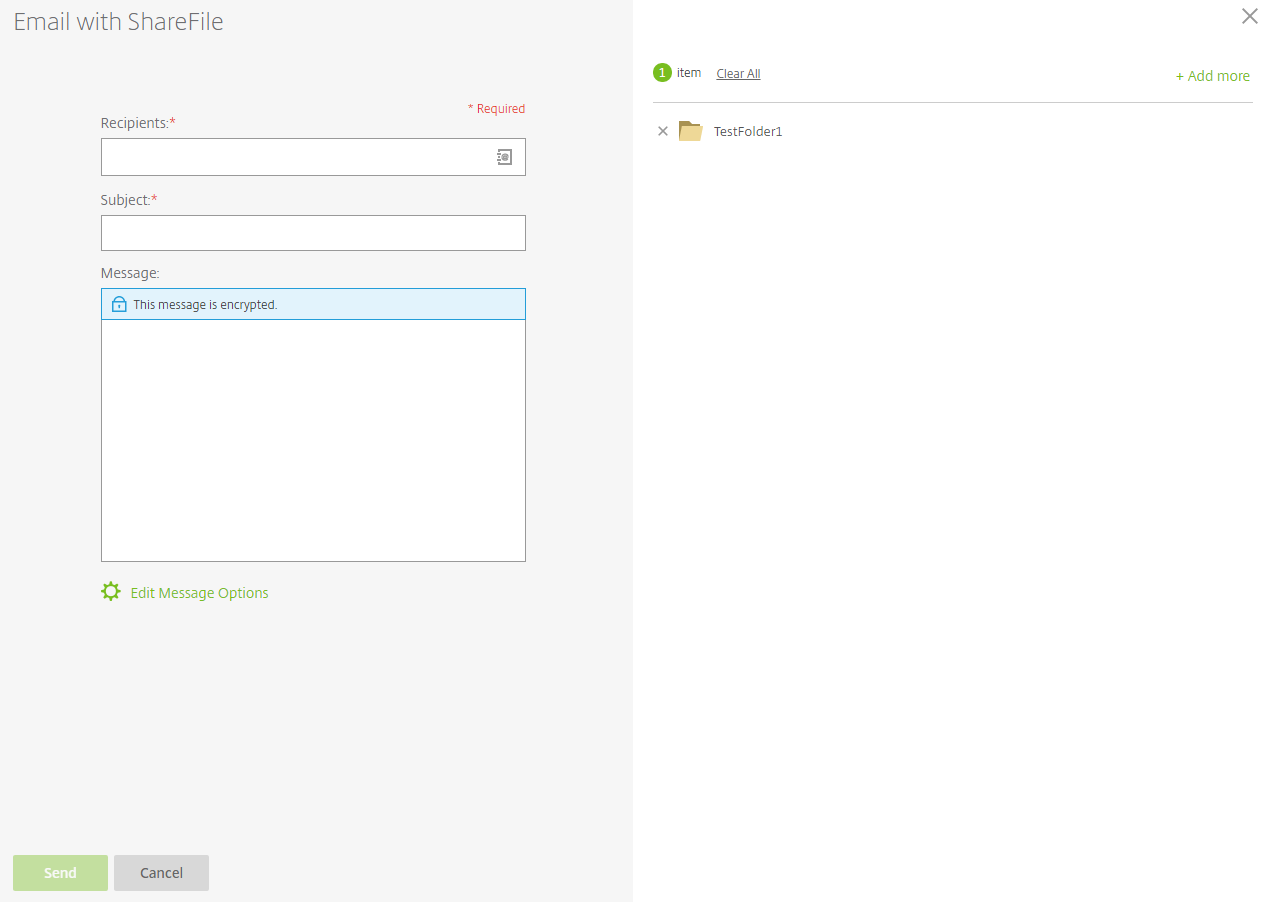
As you can see, the folder that you initially shared is shown in the top right-hand corner of the screen. On the left, you need to enter the Recipient(s) of the message, the Subject of the message, and if you like you can add an additional Message.
Firstly, we need to choose who we are going to send the message to. In the recipients field, there is a small icon as you can see below.

If you click this icon, your address book will open. This will contain all of the contacts that have been added to either your Personal Address Book, Shared Address Book, or one of your Distribution Groups.
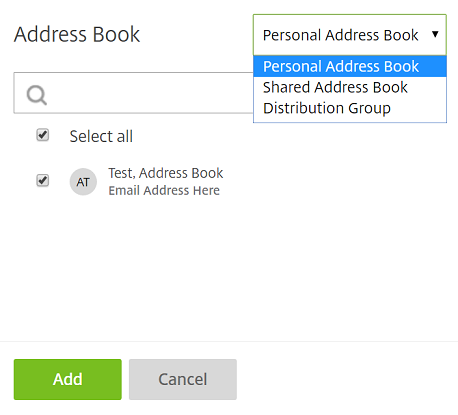
Click Add to confirm that you wish to add the user(s) to the message.
Following this, enter a subject (this is mandatory) and if you like, enter an additional message.
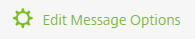
Below this, you will be able to see an icon named Edit Message Options
As you can see below, various options can be edited for your purpose.
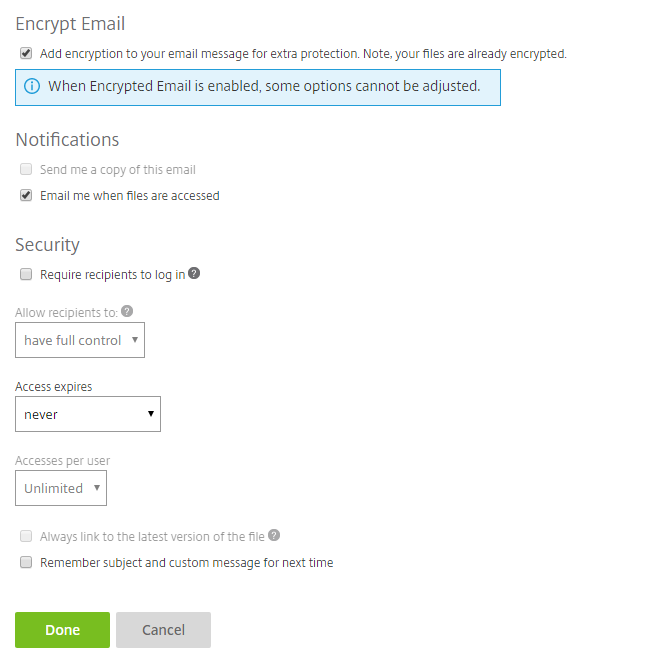
Encrypt Email - If this option is selected, the user will be required to login in order to view the files that they have been sent. However, if this option isn’t selected, the user will not be required to login in order to view the files that they have been sent.
Send me a copy of this email - If this option is selected, you’ll also be emailed the exact same copy of the email that is being sent to your recipient(s) Note: If Encrypt Email is selected, this option won’t be available.
Require recipients to log in - If this option is selected, the recipients will have to log in with their FastDrive credentials before they can access any of the files that they have been sent.
Allow recipients to: - Here, select Full control Note: If Encrypt Email is selected, this option won’t be available.
Access expires - You have the option to make your message and file(s) expire after a certain amount of time. You can set this as low as one day or you can choose for access to never expire at all.
Accesses per user - You can choose to limit how many times a user can access the files within the email. You can set this between 1 and 10 or you can set this as unlimited.
Always link to the latest version of the file - If this option is selected, whenever the user opens the email, they will have access to the latest versions of the file(s) that they have been sent, even if a newer version has been saved after the email has been sent. If this option is not selected, the user will only be able to access the version that has been sent to them.
Remember subject and custom message for next time - If this option is selected, the subject and message that you have entered for this email will be remembered the next time that you send an email. This is particularly useful if you’re going to be consistently sending the same email to multiple different users.
The next thing to go through is Get a Link.
If you click Get a Link, you can share a file by creating a specific URL link which users will be able to access. Upon clicking this, you’ll see the following screen.
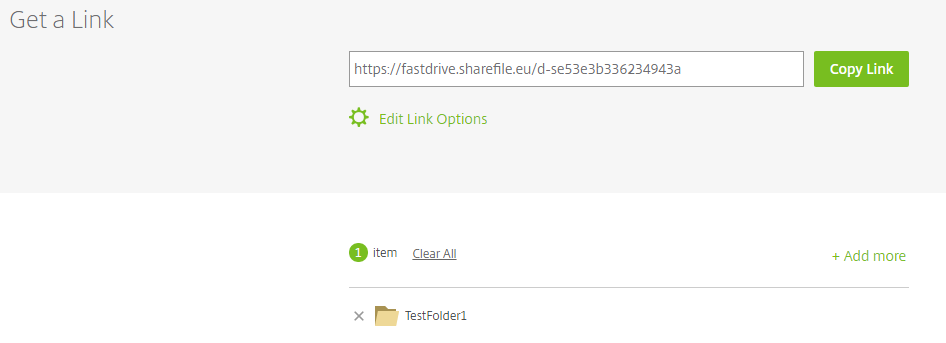
As you can see, there is a text box at the top of the screen containing a URL. You can share this link with others so that they can access specific files.
You can choose to add more files to share by hovering over the Add more button. This will allow you to add more files and folders, either from FastDrive or from your local computer

You will also be able to see a link named Edit Link Options. If you click this you’ll see the screen below. This contains a variety of options which you, the user can modify.
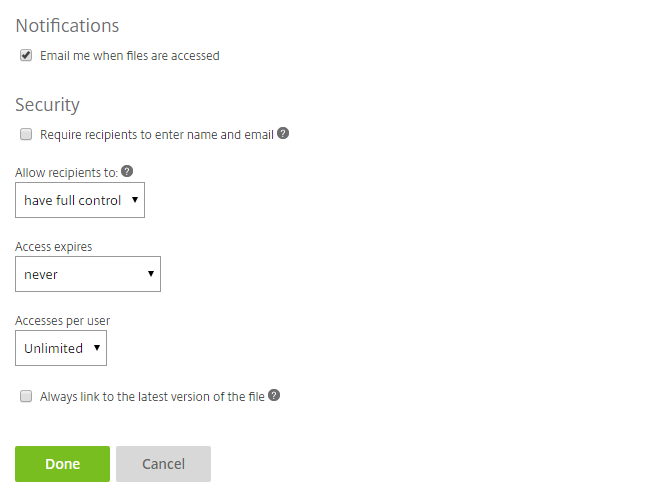
Email me when files are accessed - When a user uses the link that you have given them and downloads the files, you will be notified by email.
Require recipients to enter name and email - For tracking purposes, you can make users enter their name and email address so that you can see who is accessing the files that you have shared.
Allow recipients to: - Here, select Have full control.
Access expires - You have the option to make your message expire after a certain amount of time. You can set this as low as one day or you can choose for access to never expire at all.
Accesses per user - You can choose to limit how many times a user can access the files within the email. You can set this between 1 and 10 or you can set this as unlimited.
Always link to the latest version of the file - If this option is selected, whenever the user opens the email, they will have access to the latest versions of the file(s) that they have been sent, even if a newer version has been saved after the email has been set up. If this option is not selected, the user will only be able to access the version that has been sent to them.
For more information on how to add contacts to your address books and distribution groups, take a look at the following pages: